| There is a problem right now with this block. |
|
Warning: Documents on this site MAY NOT be used for Re-Sale
These documents are for personal use ONLY! |
4-2. 2 - Update (June 13-30, 2009)
|
2 - Update (June 13-30, 2009) rn rn rn | Update (June rn 27, 2009): Six wheels (two rears, four rn fronts) go out to the shop for removal and sand rn blasting. Determination will be made as to what rn rims and tires will be used in the final assembly rn when they are returned. | rn rn rn | | rn rn rn 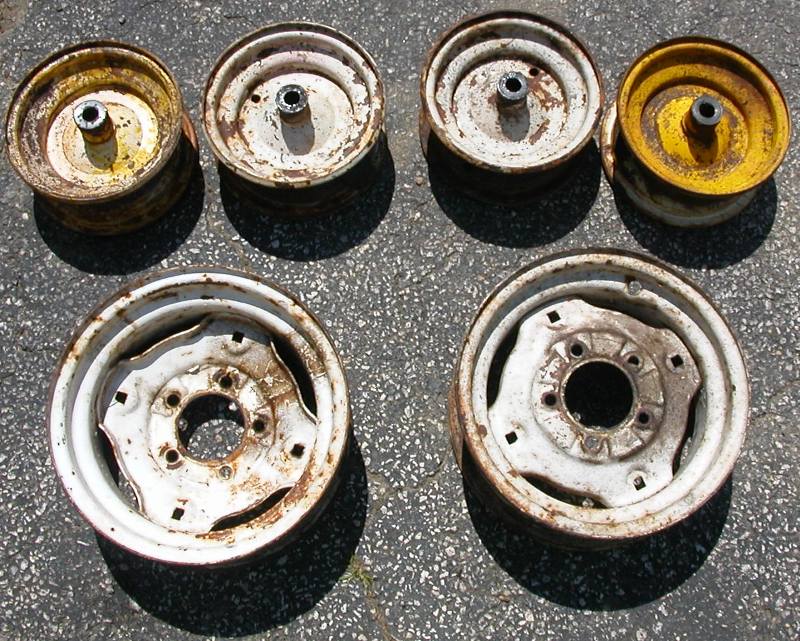 | rn | rn rn rn | | rn | rn | rn | rn rn rn | Interesting Side Note Concerning rn Wheel Horse Rim Color (Wheel Horse "Linen"): rn As stated earlier, I spoke at length with Vic and rn Dick McNeal at the 2009 Wheel Horse Show, while rn admiring Vic's beautiful WH "16". Vic had described rn many of the painting features, products, and methods rn used in the restoration of this superb machine. rn I asked about his choice of wheel paint, as it appeared rn to me to be as perfect a color match as I'd ever rn seen. In particular I questioned which manufacturer rn and color he'd used on them, and his answer surprised rn me. Based on our previous paint discussions, I was rn sure he'd had the wheel paint "color-matched", as rn he had done for the red paint on the body panels. rn He stated he'd used Sherwin-Williams "Antique White" rn from a rattle can. I almost could not believe it rn because they just looked so good. I stopped at a rn local Sherwin-Williams store and bought a can, and rn using my dismounted rims before they were sand blasted, rn performed a side-by-side color test. See for yourself rn in the pictures below. | rn rn rn | Sherwin Williams rn - Controls Rust - Antique White (paint code 140-2486) | rn rn rn rn rn  | rn rn rn 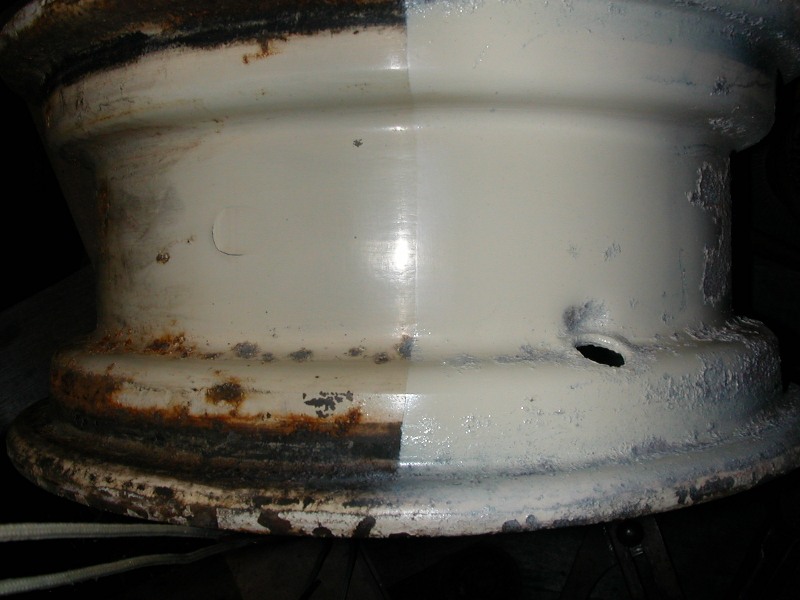 | rn rn rn 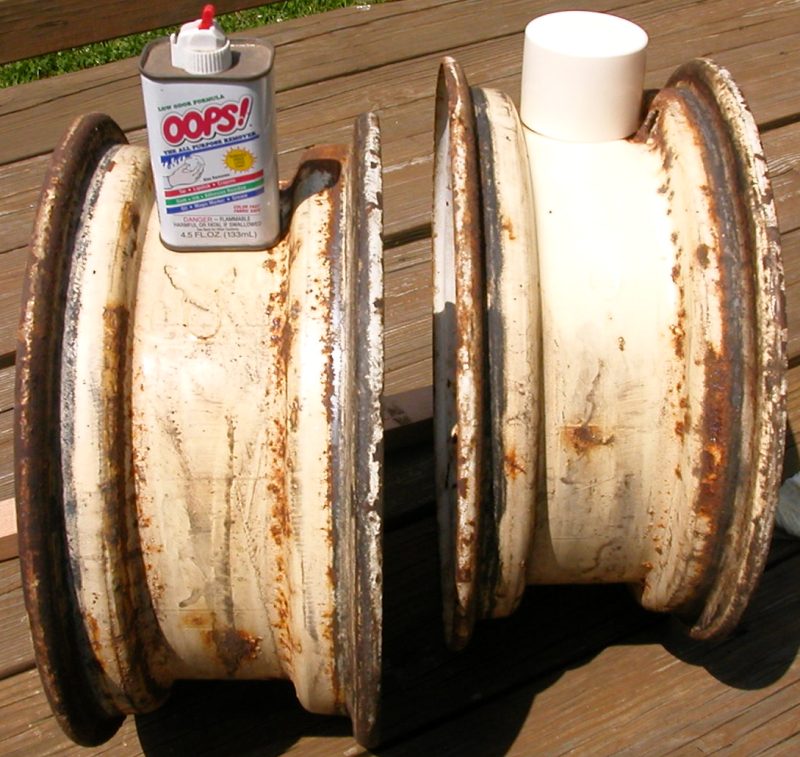 | rn | rn rn rn | Vic McNeal's WH 16 | rn This is the resulting side-by rn side comparison of the original Wheel Horse Linen rn color vs. the Sherwin-Williams Antique White from rn a spray can. Less than half a shade different (at rn the worst case) for less than $5 a can. | rn Side-by-Side Comparison | rn | rn rn rn | | rn | rn | rn | rn rn rn The original paint on the inside rn of my restorations rear rims is reasonably well rn preserved. To test Vic's assertion, I cleaned the rn original paint with "Oops!" (similar to "Goof-Off") rn and some steel wool, in order to remove dirt and rn surface oxidation. I then masked half of the cleaned rn area and sprayed Sherwin-Williams "Antique White" rn to see a side-by-side comparison of this rattle rn can paint versus the original Wheel Horse Linen rn wheel color.
rn
rn Both rear rims shown side-by-side. The left rim rn is shown as it was found, the right is cleaned with rn Oops! and Steel Wool as is described above, and rn the color cap from the spray can is there as a reference. | rn rn rn | | rn | rn | rn | rn rn rn | The color match proves rn to be, in my opinion, Extremely rn close. In light of the original paint being 51 years rn old and time-aged, even protected as it was inside rn the rim, I believe that time and wear has darkened rn the original paint a shade. I have to believe that rn the Sherwin-Williams paint is as close to the original rn paint color sprayed in South Bend in 1958, as your rn likely to find from a rattle can. At less than $5.00 rn a can, you certainly can't beat the price. Sherwin-Williams rn paints cover very well, dry fast, thin and hard, rn is very shiny, and looks great on well prepared rn metal surfaces. I am now a believer, and will now rn use this paint on all my "old" rims and seat pans. | rn rn rn | | rn | rn | rn | rn rn rn | June 28, rn 2009: I completed many of the red parts. rn Front Axle Assembly; Seat Spring, Seat Hardware rn and Shifter Assembly; Attachment Lift Handle and rn Clutch/Brake Assemblies completed back to the brake rn band and idler arm; Rear Hubs, Draw Hitch, Attachment rn Side Plates, and the Attachment Lift Link. Began rn work on the Brake Drum, Drive Pulley, the Reel Mower rn Attachment Arm, and various other "spare parts" rn from the parts machine. | rn rn rn rn rn  | rn rn rn | Completed rn Axle Assembly (minus new "Clevis Pin, Completed rn Hubs, Hitch Attachment Plates and Lift LinkSteering" rn parts) | rn rn rn | | rn | rn | rn | rn rn rn | rn Refinishing Processrn | rn rn rn rn rn 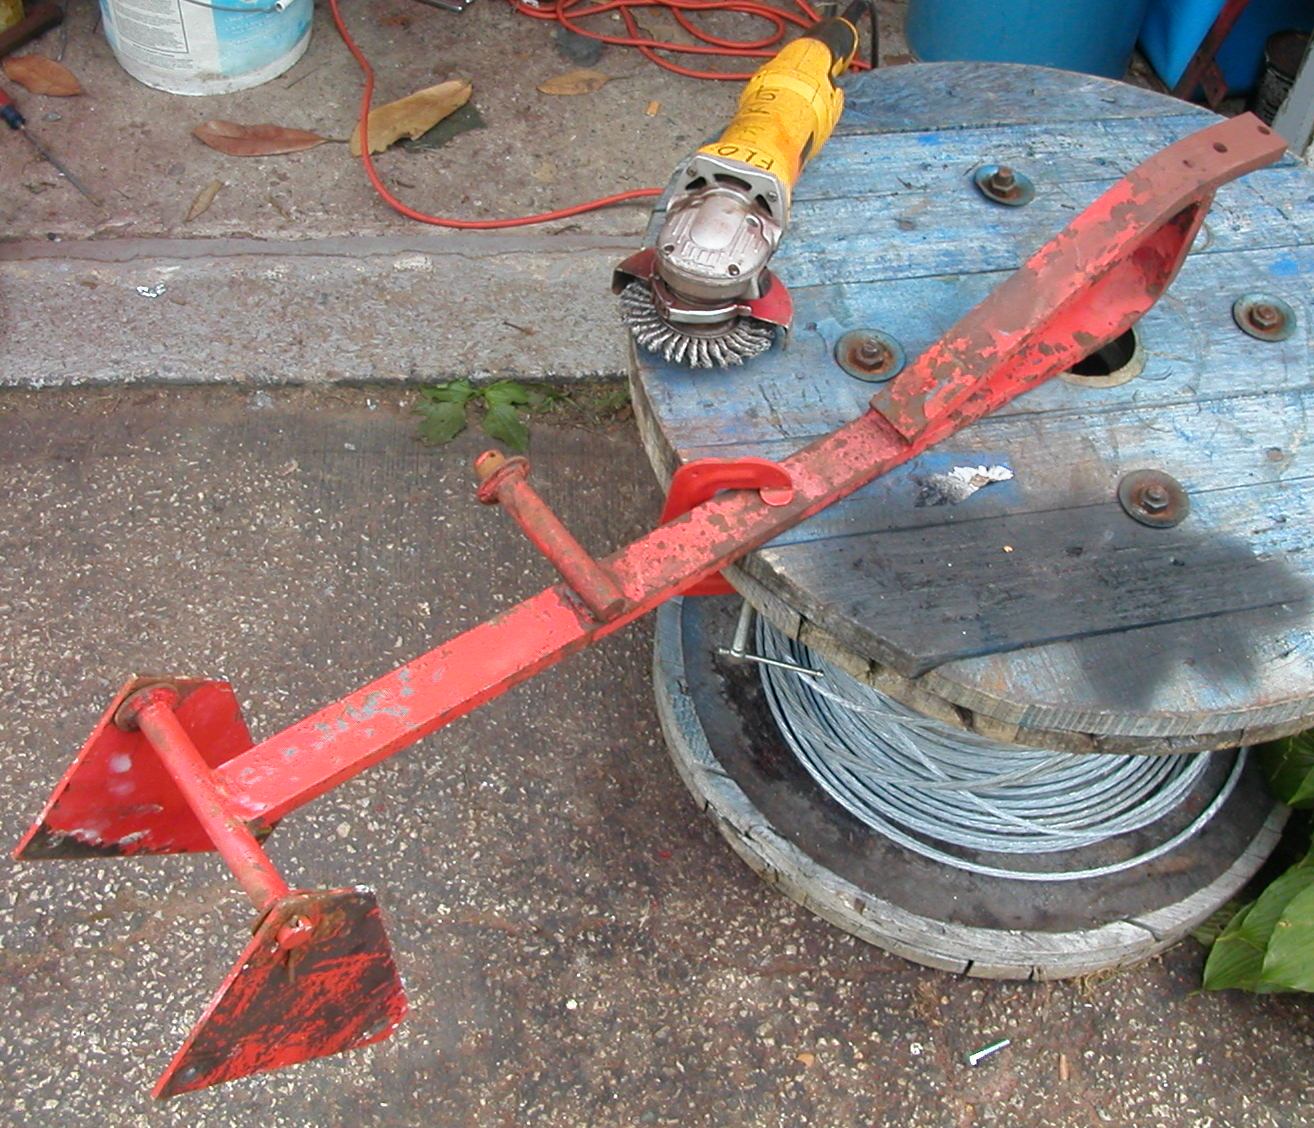 | rn rn rn 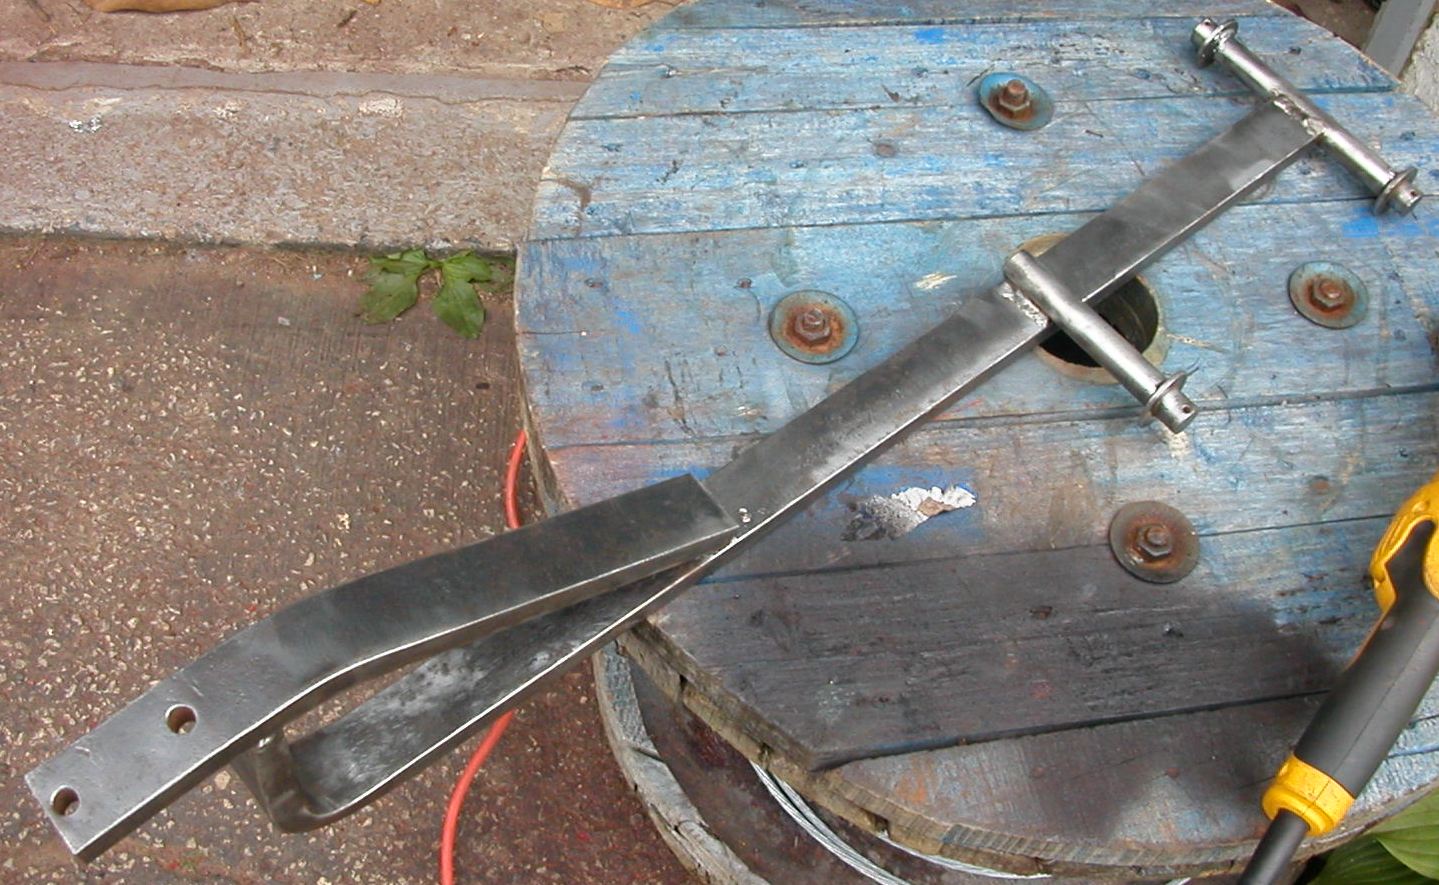 | rn rn rn 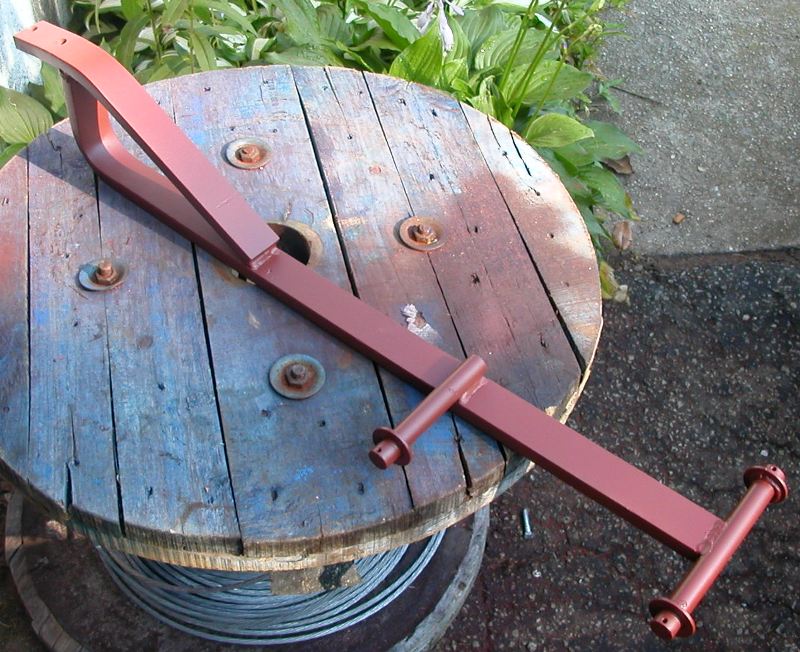 | rn rn rn 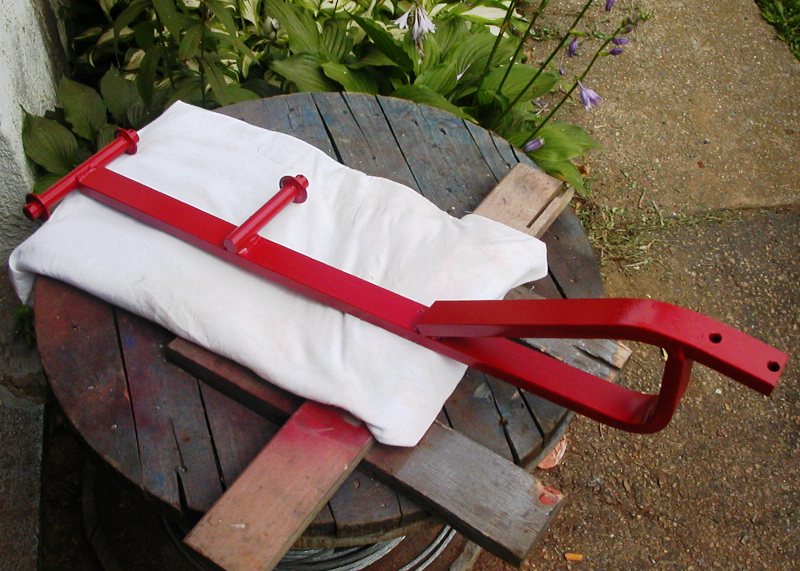 | rn rn rn | Original Part | rn Stripped & Prepared | rn Primed | rn Painted | rn rn rn | Attachment Arm before rn work begins. There appear to be three coats of paint rn on this Reel Mower Attachment Bar; the original rn paint, a green color then the orange. White pin rn stripes were added by to the Hanger Plates a previous rn owner. | rn Attachment Arm has rn been wire wheeled, sanded, edge dents repaired, rn and cleaned with "Metal Prep". When stripping parts, rn make sure they are primed within 30 minutes of being rn dry or they will begin to rust immediately. | rn Attachment rn Arm has been primed, allowed to dry for 4 days, rn sanded with 400 and 800 grit wet paper, cleaned rn with "Simple Green", rinsed with water, and dried rn in the sun. | rn Attachment rn Arm has been Painted with "Valspar Restoration Series rn - Tractor and Implement - IH (International Harvester) rn Red" | rn rn rn | | rn | rn | rn | rn rn rn rn rn 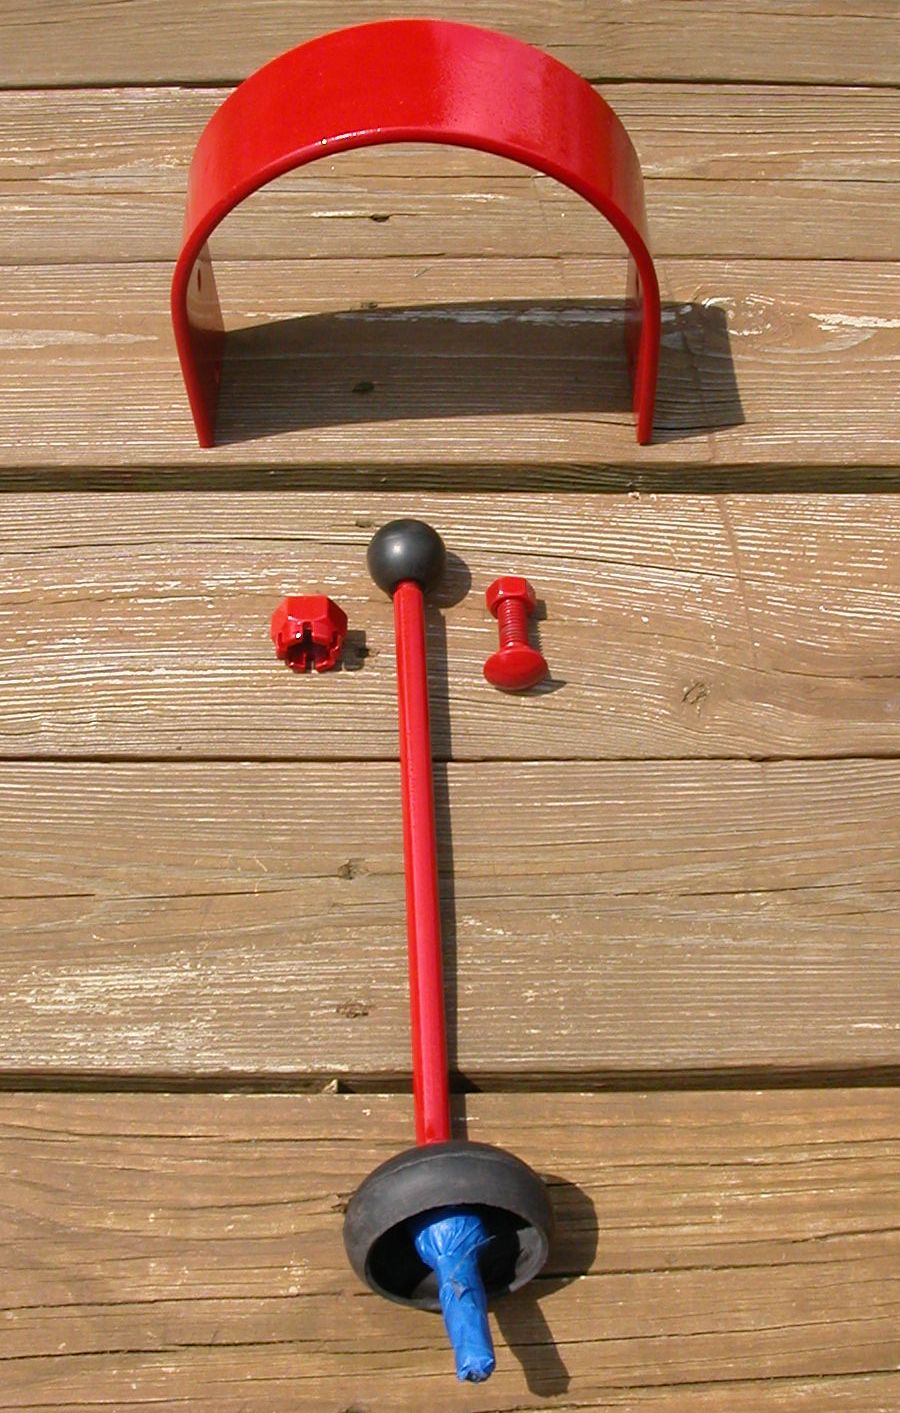 | rn rn rn 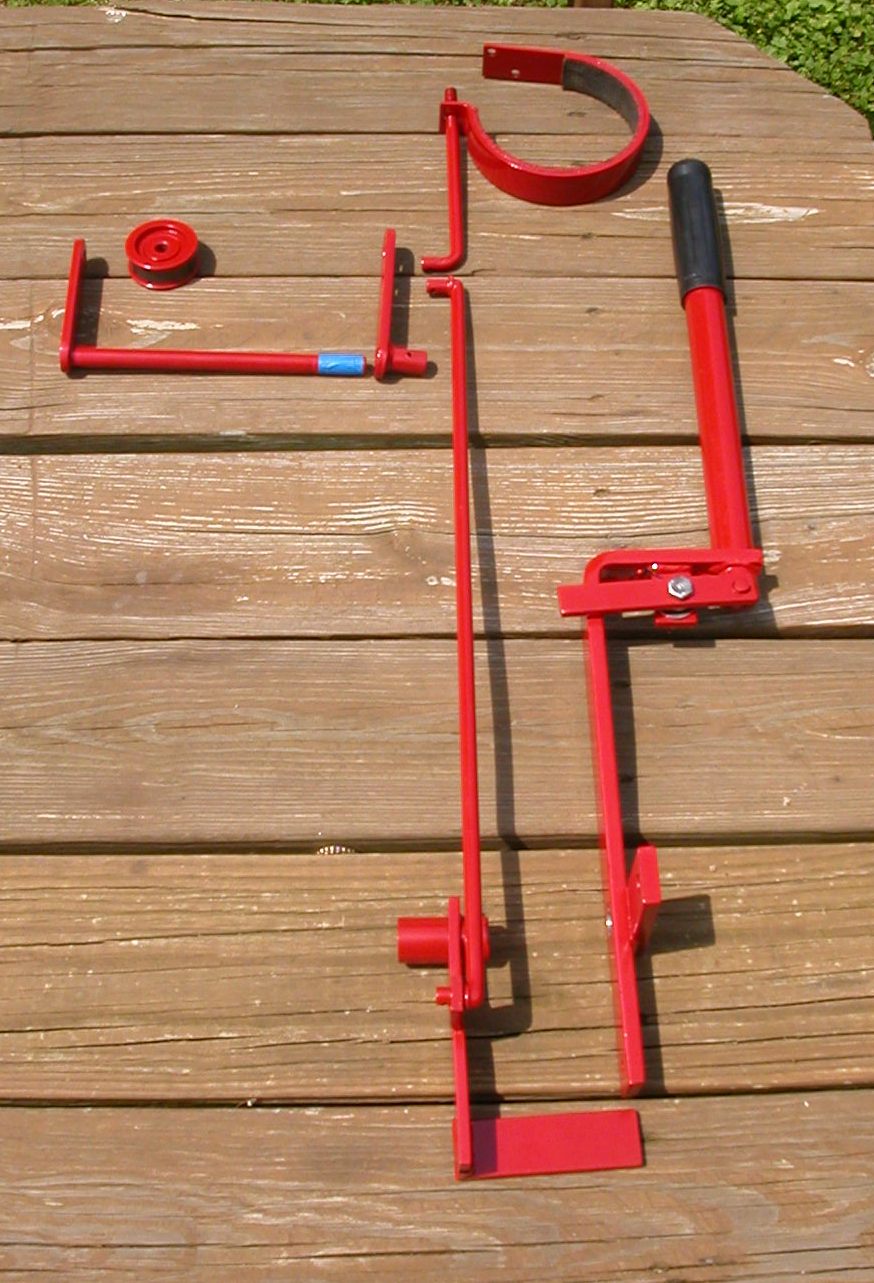 | rn rn rn 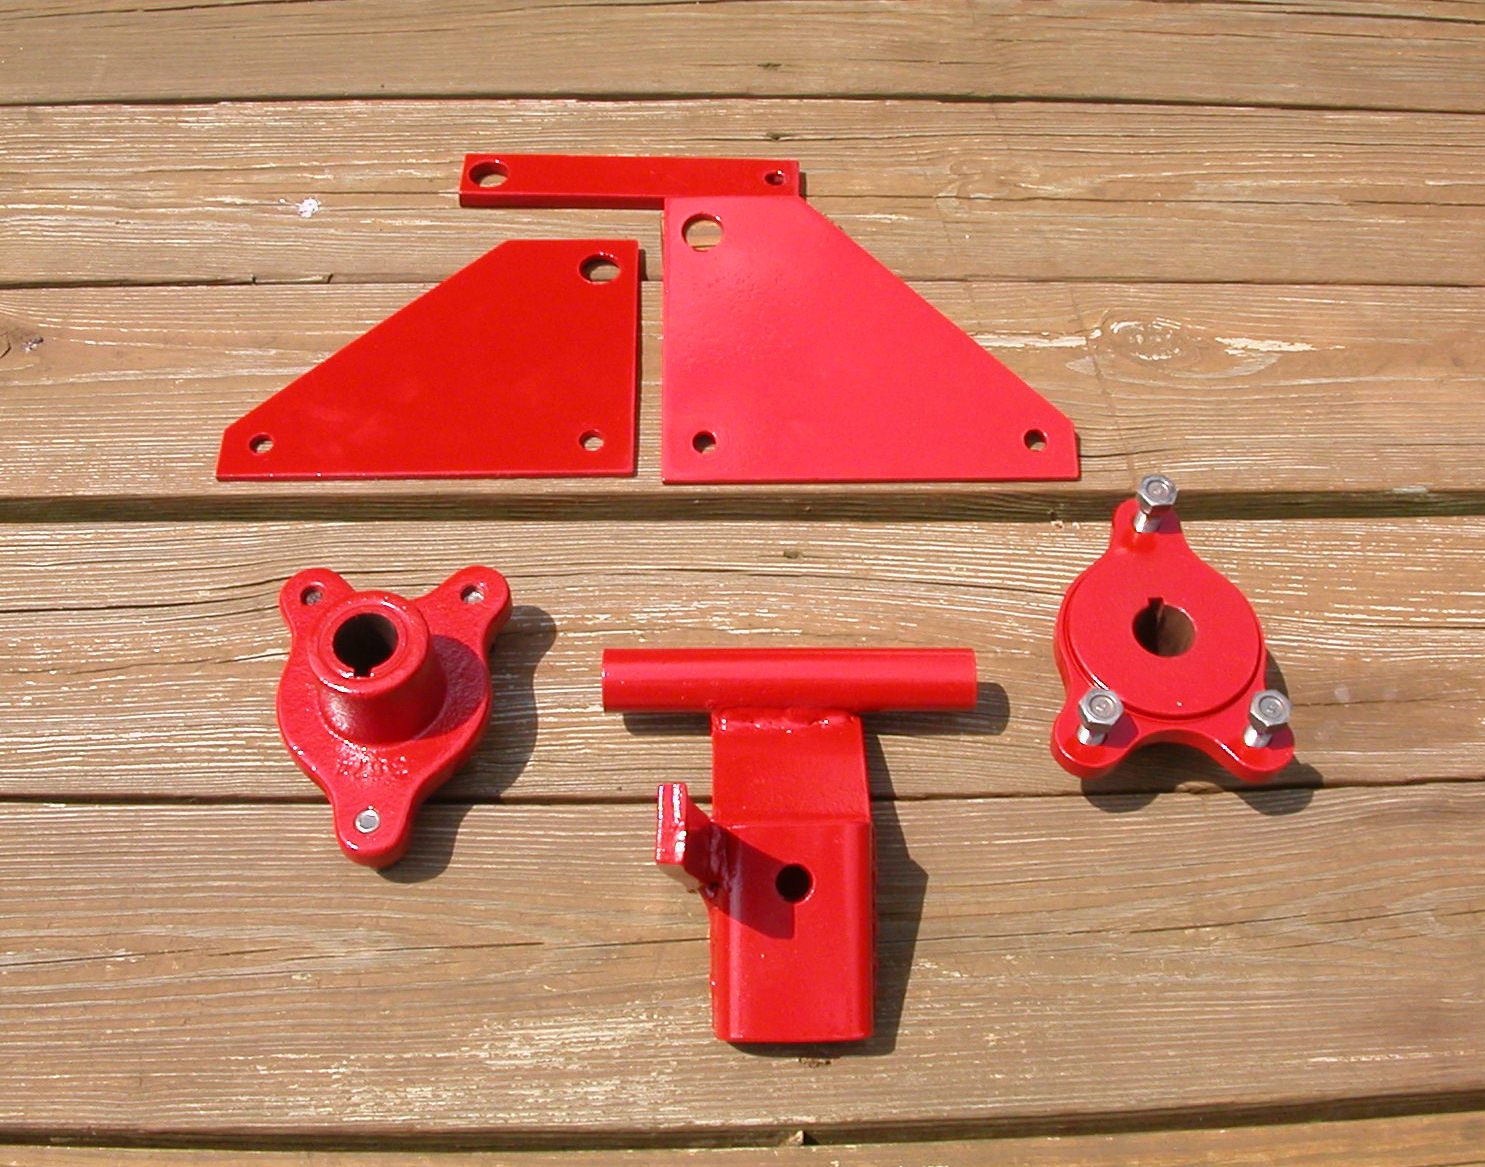 | rn | rn rn rn | Completed Shifter Assy. rn and Seat Spring and Bolt Assy. | rn Completed Brake/Clutch rn Assy. | rn Completed Hubs, Hitch rn Attachment Plates and Lift Link | rn | rn rn rn | | rn | rn | rn | rn rn rn | rn Update (June 30, 2009): Excellent rn News/Good News/Bad News Day! The rims and tires rn have returned from dismounting and sand blasting. rn All 6 original tires removed are in excellent condition rn and all are re-usable. The Tires need to be thoroughly rn cleaned and "Tire Blacked", then reinstalled on rn selected rims. This is Excellent News. Rear Rims rn are in perfect condition. Also excellent news. One rn of the front rims is in perfect condition. (again, rn Excellent News), and one of the remaining front rn rims is in perfect but damaged condition (somewhat rn Bad News), and from here on out it gets worse. rn The otherwise excellent, but damaged Rim should rn be repairable (again, somewhat Good News). The area rn immediately around the valve stem hole and downward rn toward the center of the rim before the flat area rn is badly corroded through in about a 1" x 1-1/2" rn area. The surrounding metal is very good, so I should rn be able to be cut it back to good steel, and a new rn piece of metal welded in its place. The "Not So rn Good News" part of this is that I will have to sacrifice rn one of the Very Poor condition front rims in order rn to get the proper shaped piece of metal to do the rn repair. The reason for going this route, rather rn than just finding another rim, is that this rim rn is in otherwise perfect condition. It'll take far rn less work to fix this one, than find another in rn as good condition. rn The other two front rims, as stated, are in Very rn Poor condition (this is the Bad News). Bead blasting rn revealed "black rust" on both of the bead surfaces rn of both rims. The rust does not penetrate all the rn way through, but is so deep into the metal that rn when the black rust was removed it left waves along rn the bead edges almost 1/32" deep and spaced about rn 1/2" apart. Grinding and sanding may "correct" some rn of the the issue, but they will never be show quality rn rims. rn The Brake Drum, new 1611 Drive Pulley, and Idler rn Pulley have been painted. The transmission rebuild rn will begin as the last remaining parts are in paint. rn | rn rn rn | | rn rn rn 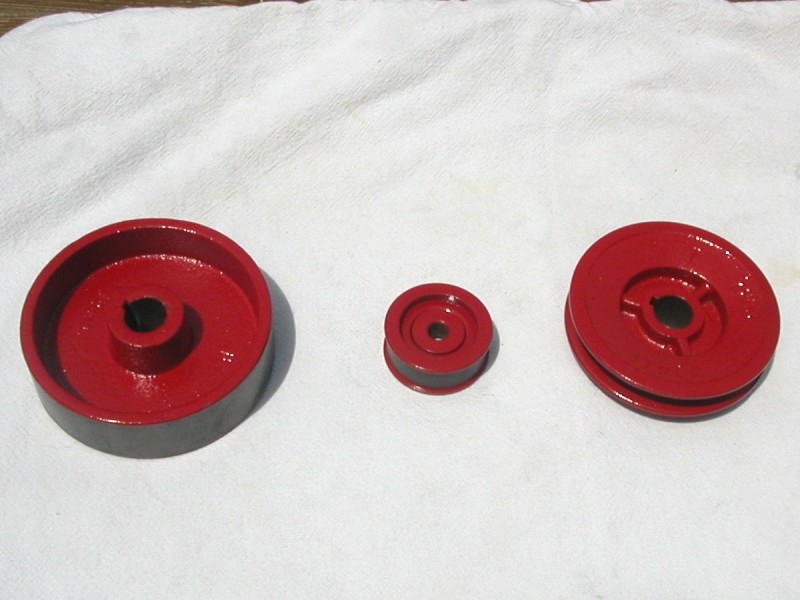 | rn | rn | rn rn rn | | rn Completed Pulley Parts | rn | rn | rn rn rn | | rn | rn | rn | rn rn rn | | rn | rn | rn | rn rn rn
|
Last Updated: 2010-02-05 17:59:11 (104 views)
|
|


 Previous